115 lines
3.0 KiB
Markdown
115 lines
3.0 KiB
Markdown
<h1><center>Zabbix-Proxy部署</center></h1>
|
||
|
||
------
|
||
|
||
**作者:行癫(盗版必究)**
|
||
|
||
## 一:环境准备
|
||
|
||
| 主机名 | 地址 |
|
||
| :-----------: | :----------: |
|
||
| zabbix-server | 10.36.174.13 |
|
||
| zabbix-proxy | 10.36.174.24 |
|
||
| zabbix-agent | 10.36.174.23 |
|
||
| zabbix-mysql | 10.36.174.90 |
|
||
|
||
<img src="https://xingdian-image.oss-cn-beijing.aliyuncs.com/xingdian-image/image-20230301172434027.png" alt="image-20230301172434027" style="zoom:80%;" />
|
||
|
||
## 二:部署Zabbix-server
|
||
|
||
略
|
||
|
||
## 三:部署Zabbix-proxy
|
||
|
||
#### 1.准备仓库
|
||
|
||
```shell
|
||
[root@zabbix_proxy ~]# rpm -Uvh https://repo.zabbix.com/zabbix/5.0/rhel/7/x86_64/zabbix-release-5.0-1.el7.noarch.rpm
|
||
```
|
||
|
||
#### 2.安装zabbix-proxy
|
||
|
||
```shell
|
||
[root@zabbix_proxy ~]# yum install zabbix-proxy-mysql -y
|
||
```
|
||
|
||
#### 3.安装数据库
|
||
|
||
略
|
||
|
||
#### 4.配置数据库
|
||
|
||
```shell
|
||
mysql> create database zabbix_proxy character set utf8 collate utf8_bin;
|
||
mysql> grant all on zabbix_proxy.* to zabbix_proxy@'%' identified by '123456';
|
||
```
|
||
|
||
注意:
|
||
|
||
本次使用的是单独的数据库服务器,需要在数据库服务器上授权远程登录
|
||
|
||
#### 5.配置zabbix-proxy
|
||
|
||
```shell
|
||
[root@zabbix_proxy ~]# vim /etc/zabbix/zabbix_proxy.conf
|
||
ProxyMode=0 开启主动模式
|
||
Server=10.36.174.13 指定zabbix-server地址
|
||
Hostname=zabbix_proxy 设定名字
|
||
DBHost=10.36.174.90 指定数据库地址
|
||
DBName=zabbix_proxy 指定数据库库名
|
||
DBUser=zabbix_proxy 指定数据库用户
|
||
DBPassword=123456 指定数据库密码
|
||
```
|
||
|
||
#### 6.重启服务
|
||
|
||
```shell
|
||
[root@zabbix_proxy ~]# systemctl restart zabbix-proxy
|
||
```
|
||
|
||
## 四:部署zabbix-agent
|
||
|
||
#### 1.安装部署
|
||
|
||
略
|
||
|
||
#### 2.修改配置文件
|
||
|
||
```shell
|
||
[root@zabbix_agent ~]# vim /etc/zabbix/zabbix_agentd.conf 指向proxy地址
|
||
Server=10.36.174.24
|
||
ServerActive=10.36.174.24
|
||
Hostname=Zabbix-agent-2
|
||
```
|
||
|
||
#### 3.重启服务
|
||
|
||
```shell
|
||
[root@zabbix_agent~]# systemctl restart zabbix-agent
|
||
```
|
||
|
||
## 五:部署zabbix-server
|
||
|
||
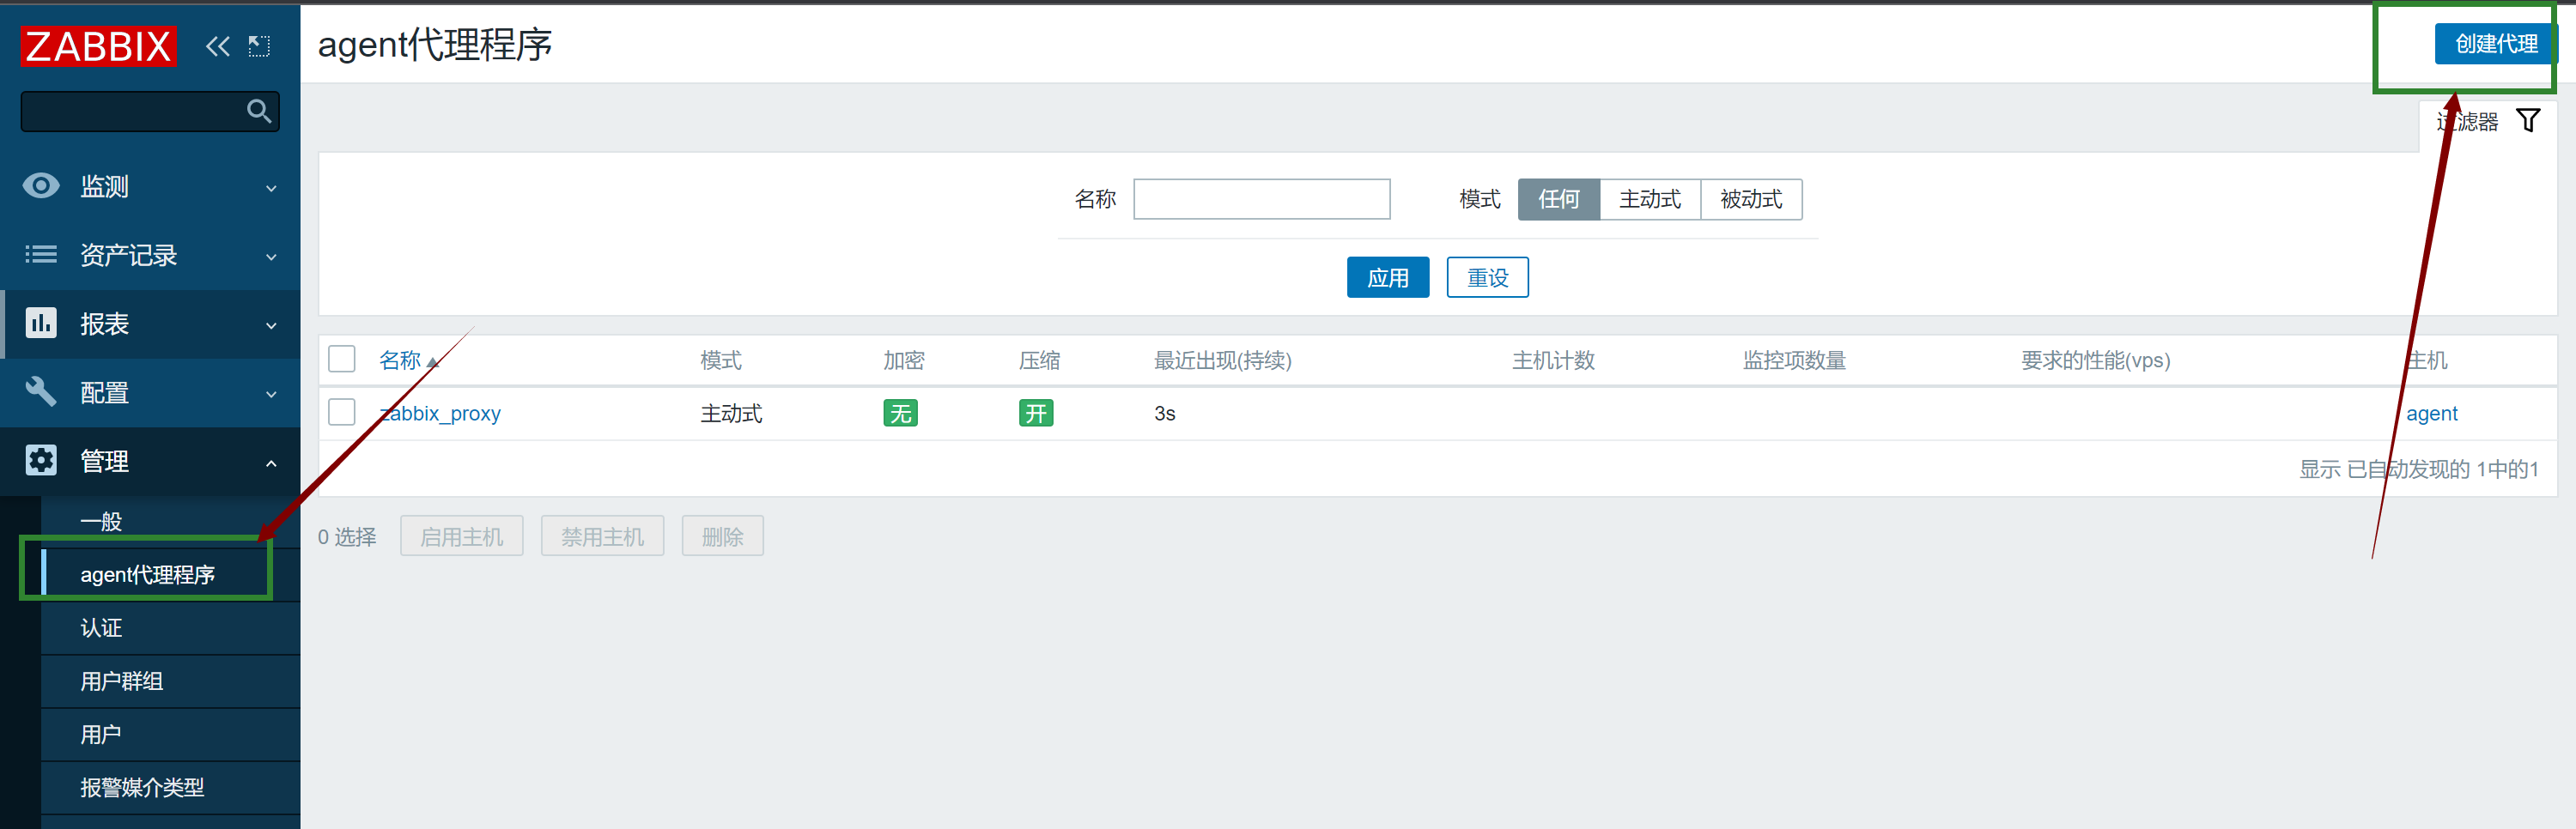
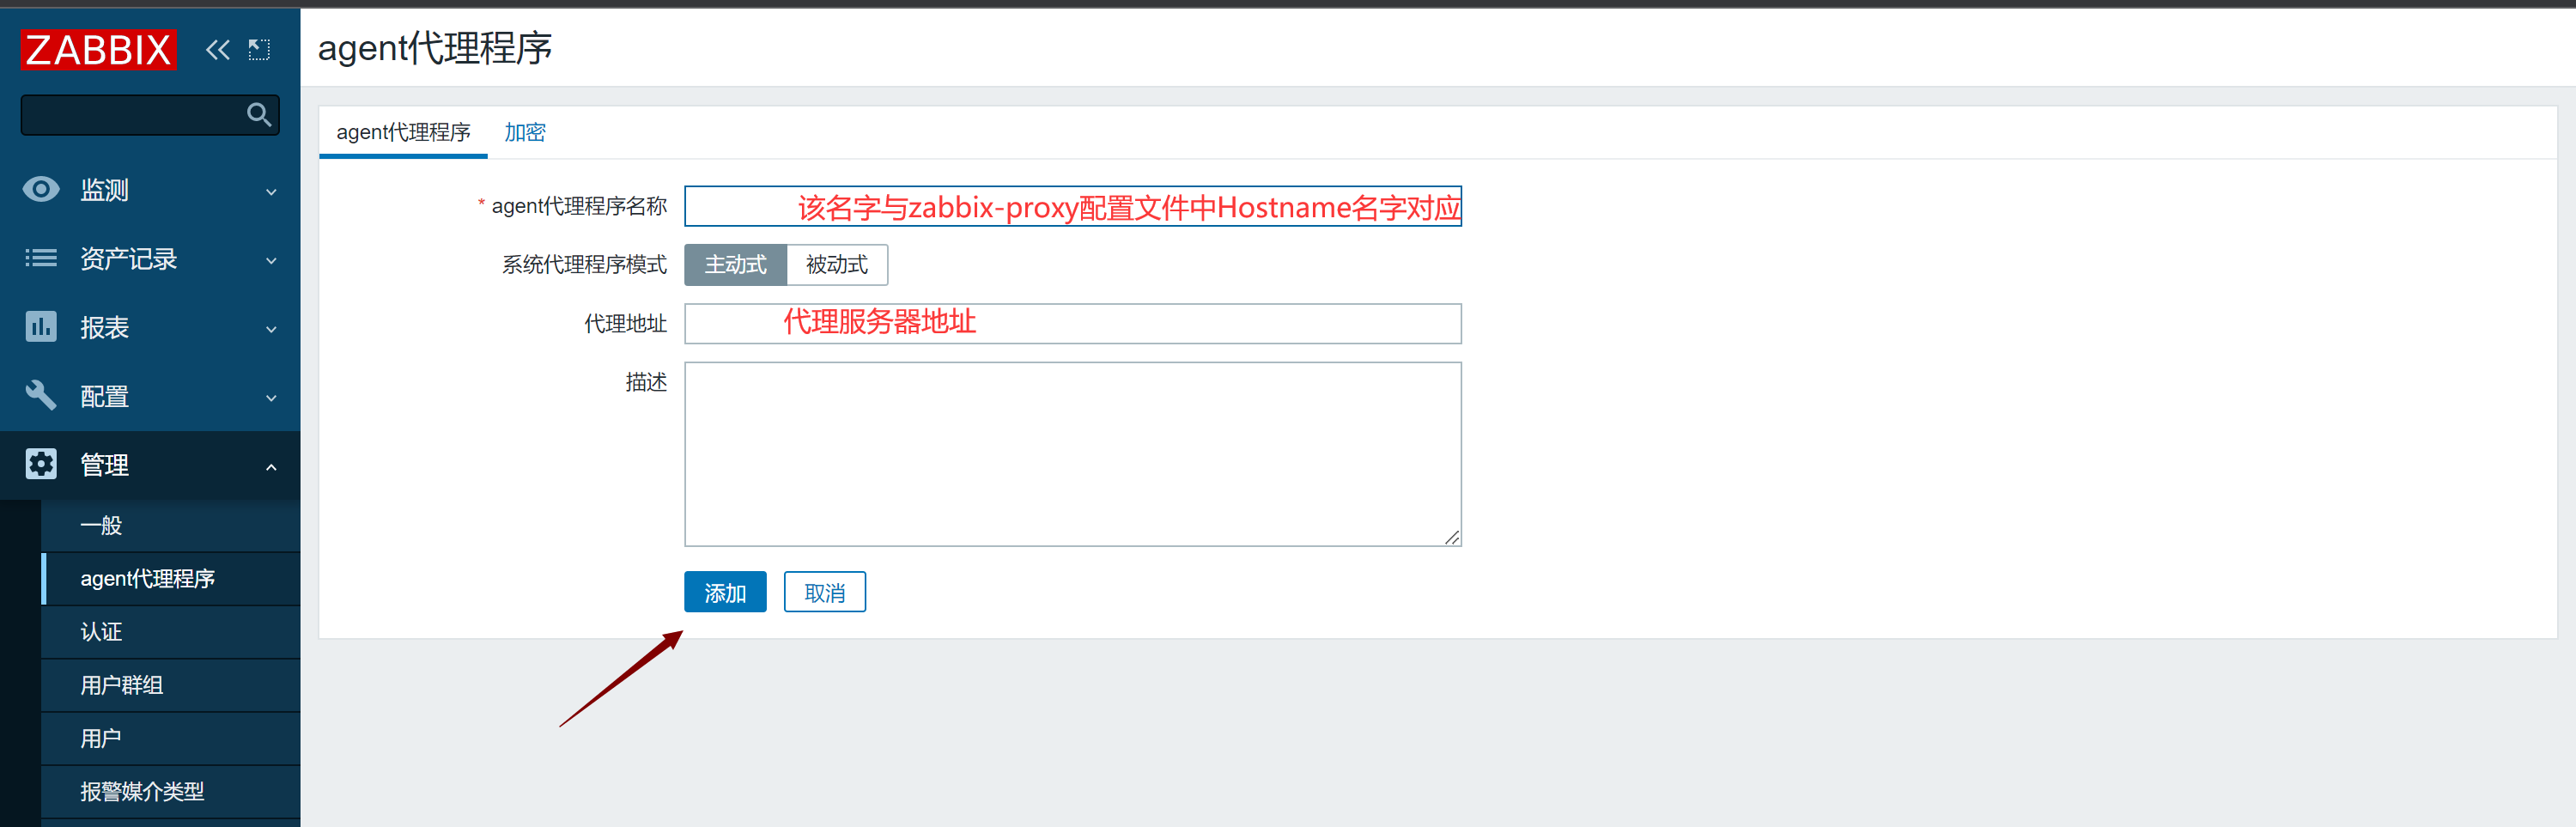
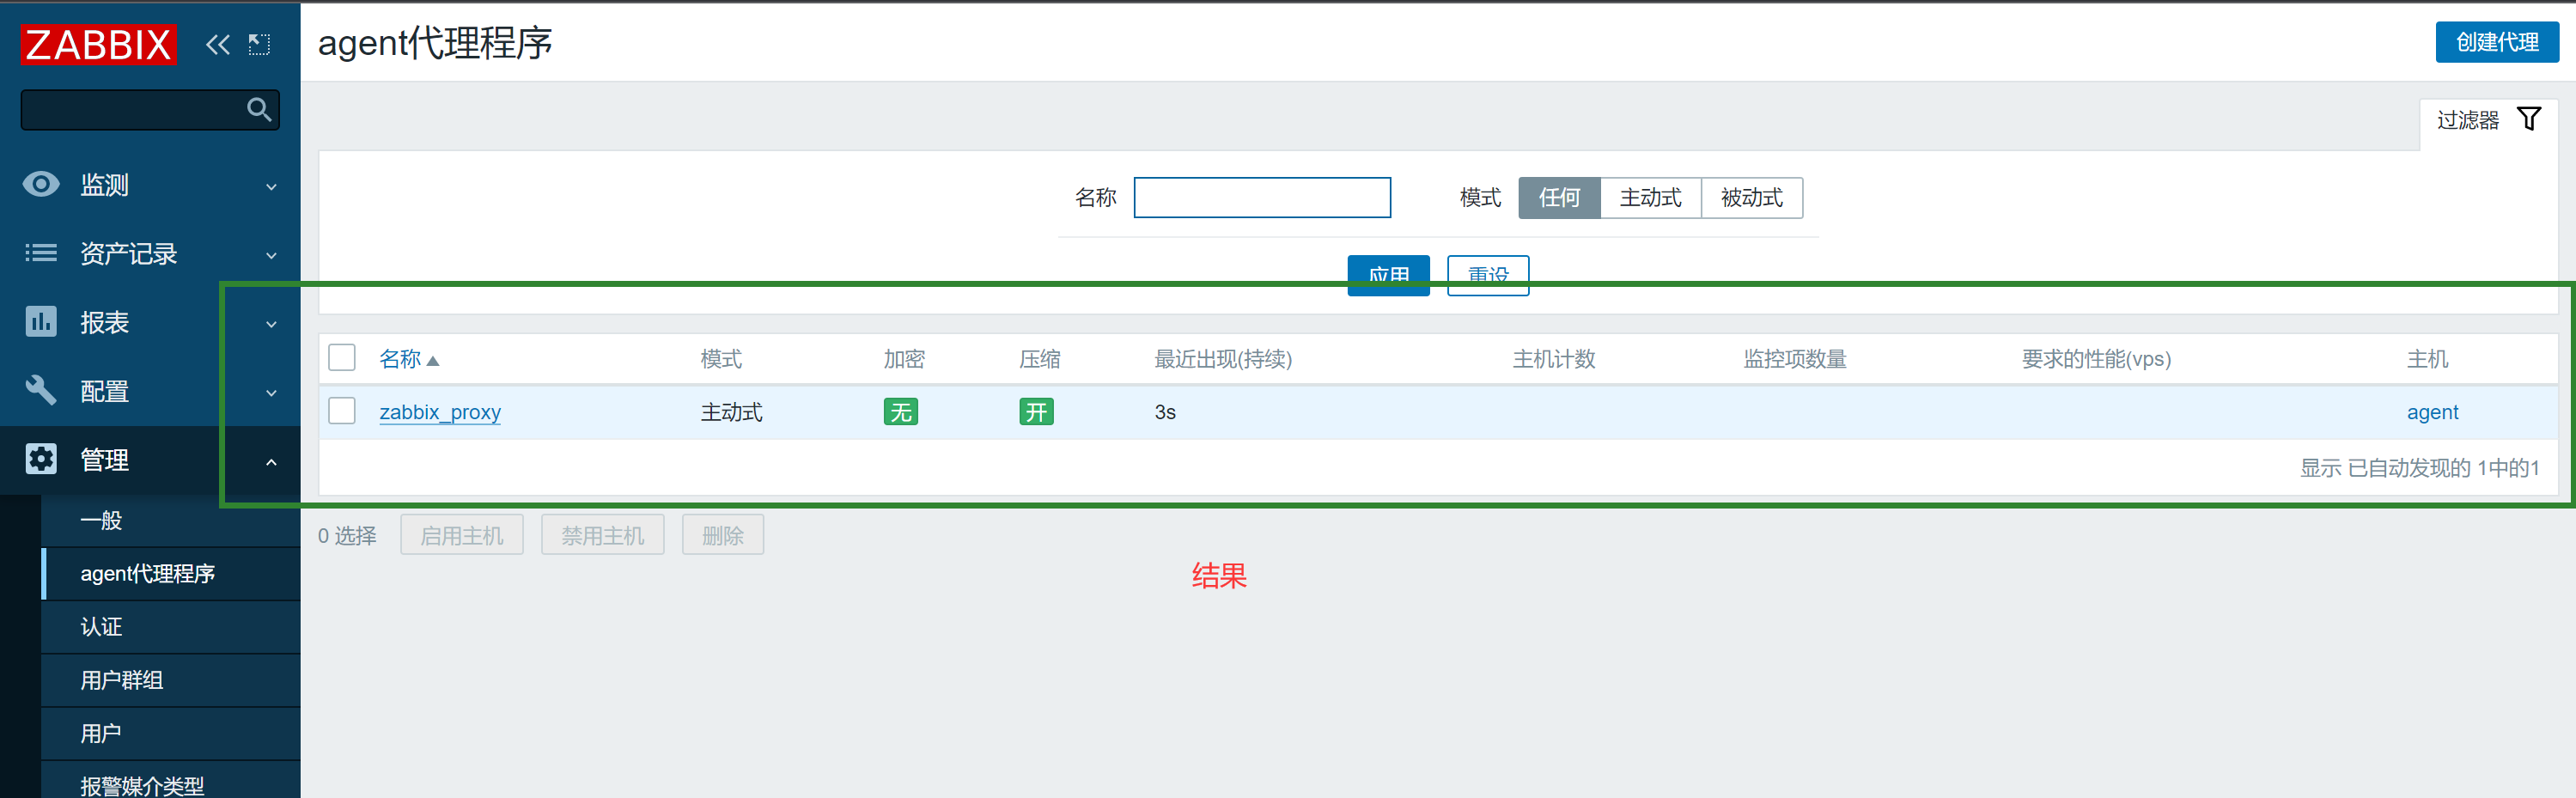
#### 1.添加agent代理程序
|
||
|
||
|
||
|
||
|
||
|
||
|
||
|
||
#### 2.配置监控主机使用代理
|
||
|
||

|
||
|
||
#### 3.配置监控项
|
||
|
||
略(检测是否可以使用代理获取数据)
|
||
|
||
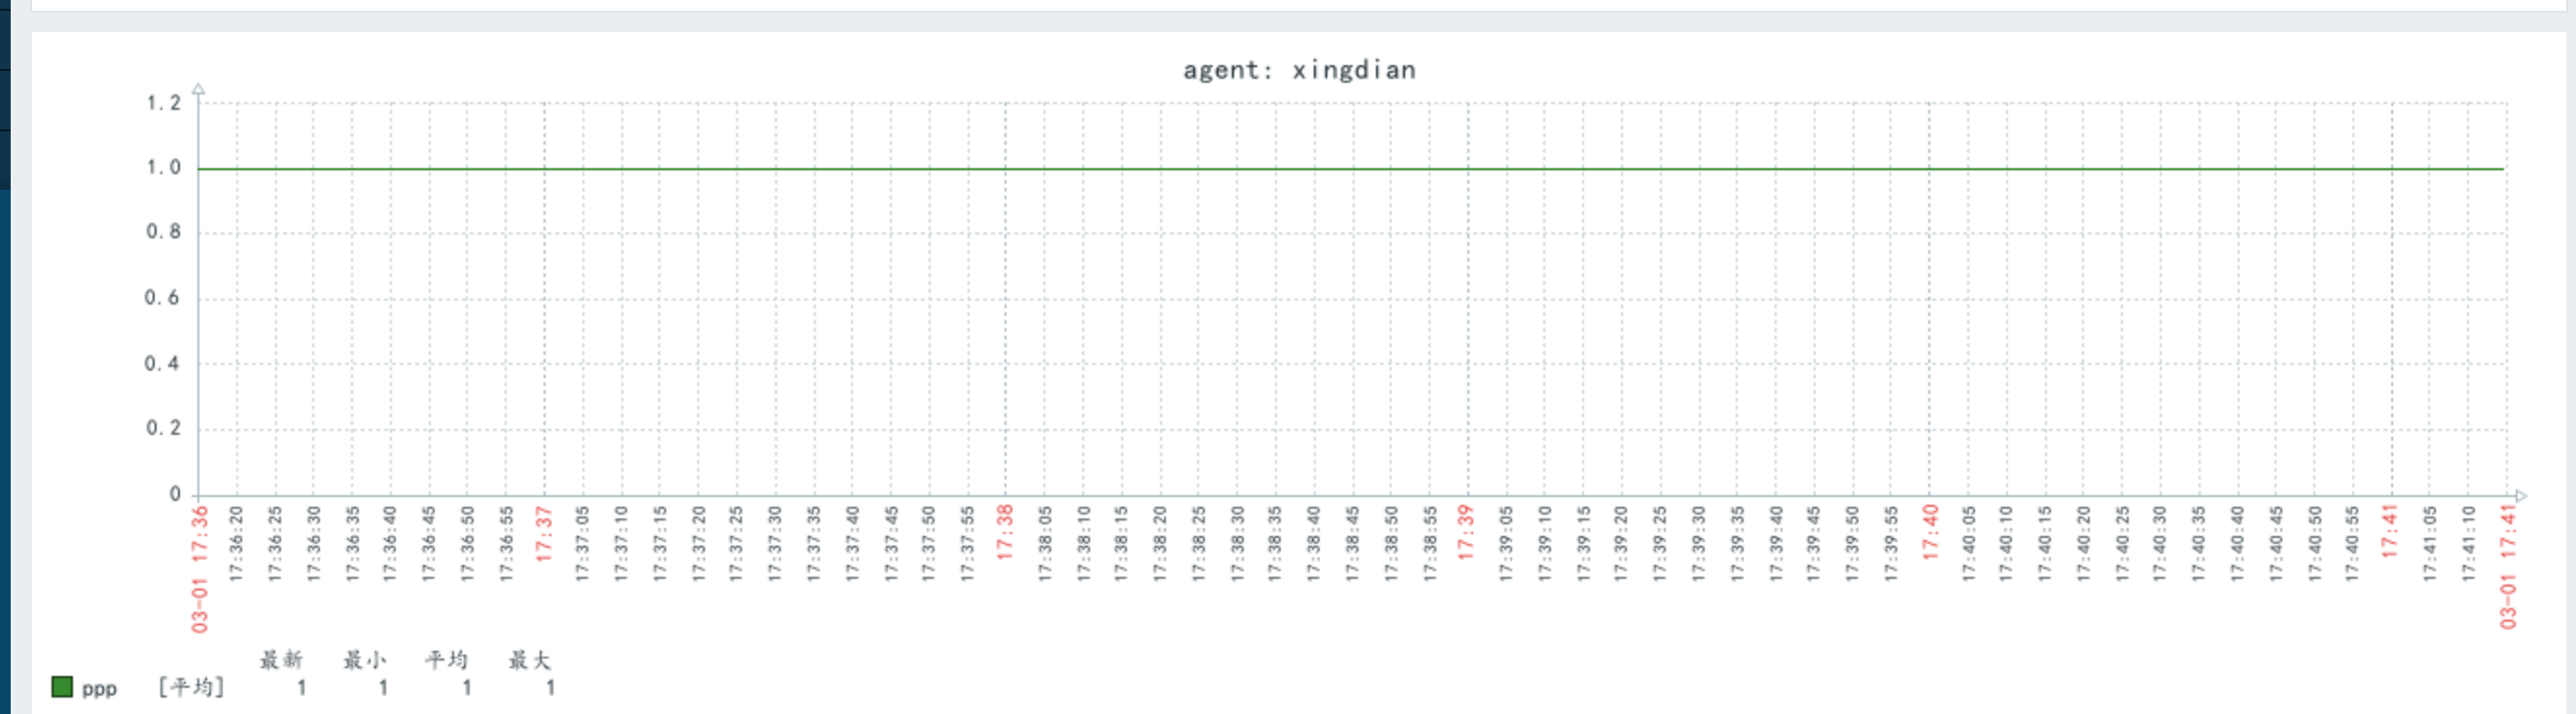
#### 4.配置图形展示
|
||
|
||
略(检测是否可以使用代理获取数据)
|
||
|
||
<img src="https://xingdian-image.oss-cn-beijing.aliyuncs.com/xingdian-image/image-20230301174101767.png" alt="image-20230301174101767" style="zoom:100%;" />
|
||
|
||
 |